Search
You have three options to search in OmbuDesk:
- The global search (outlined in red at the head of the application)
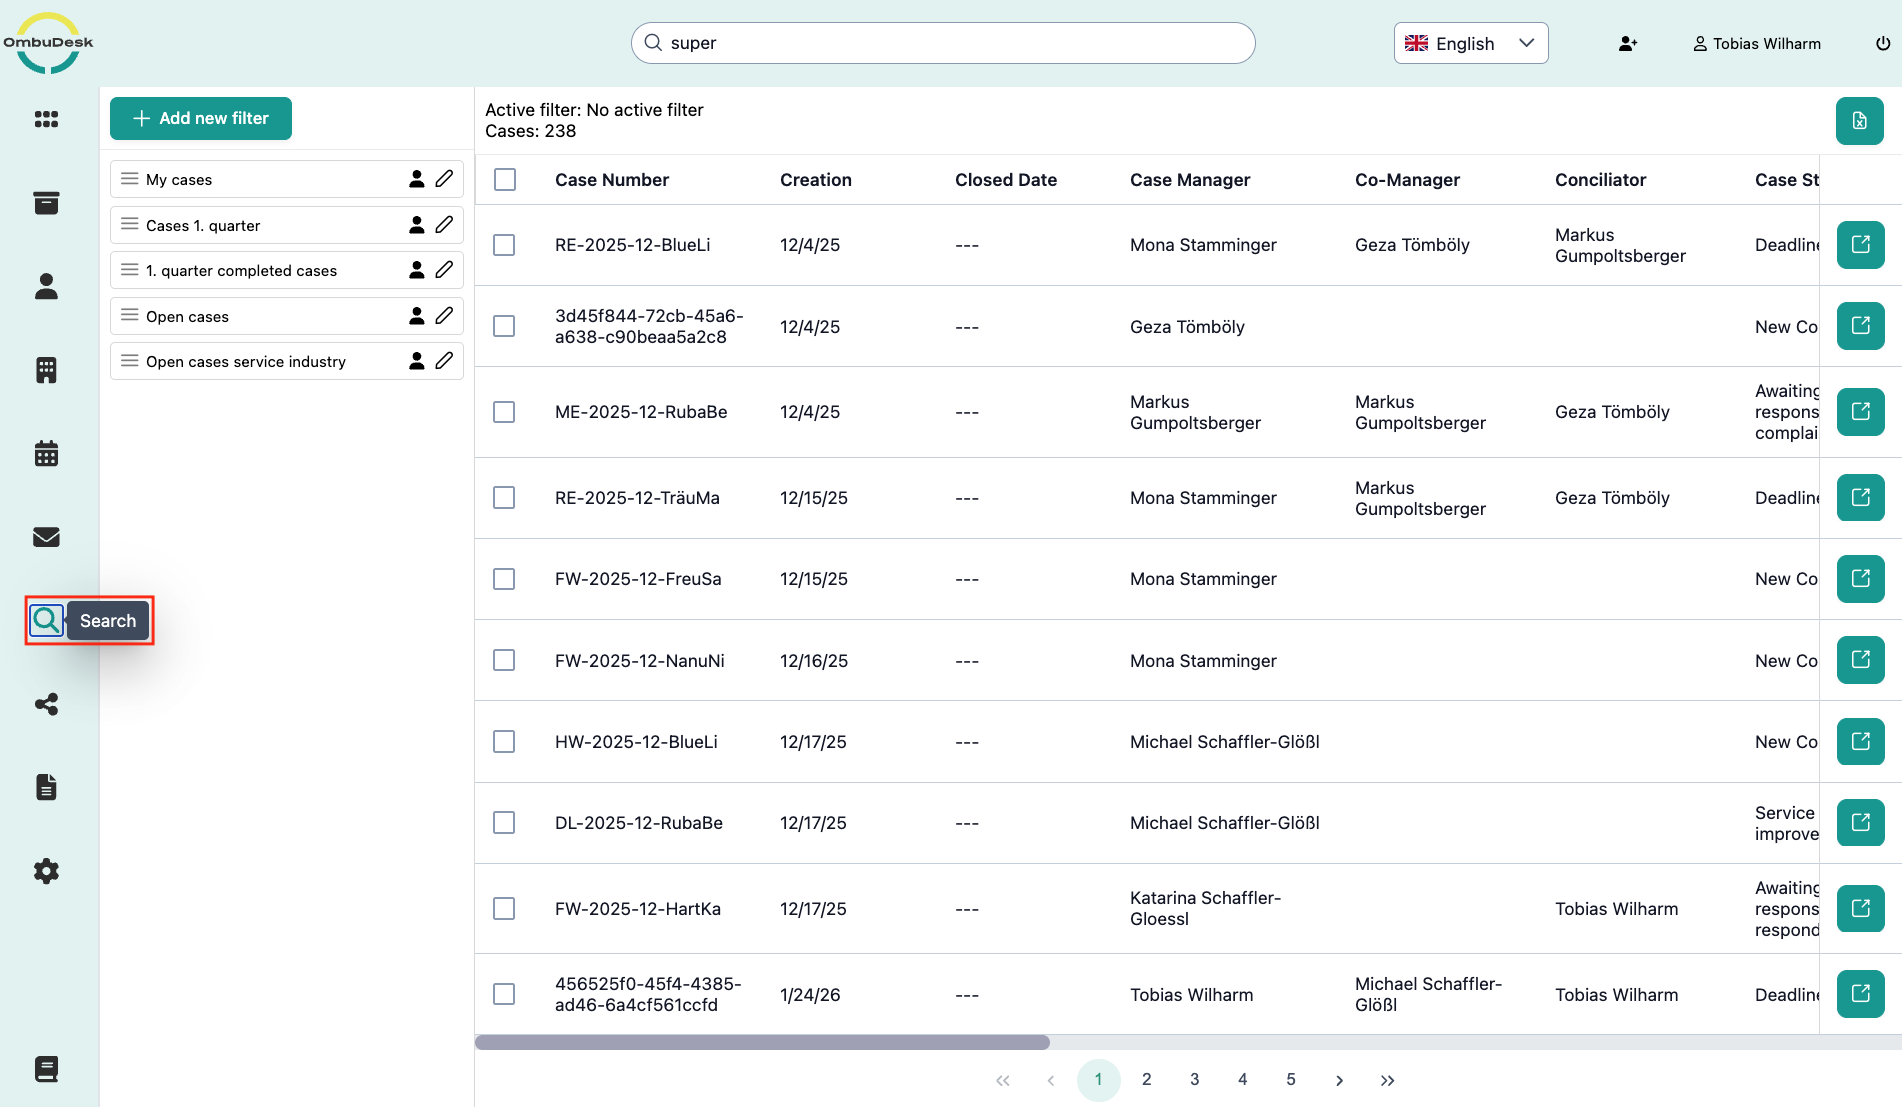
- The filter search (the magnifying glass outlined in red in the left navigation)
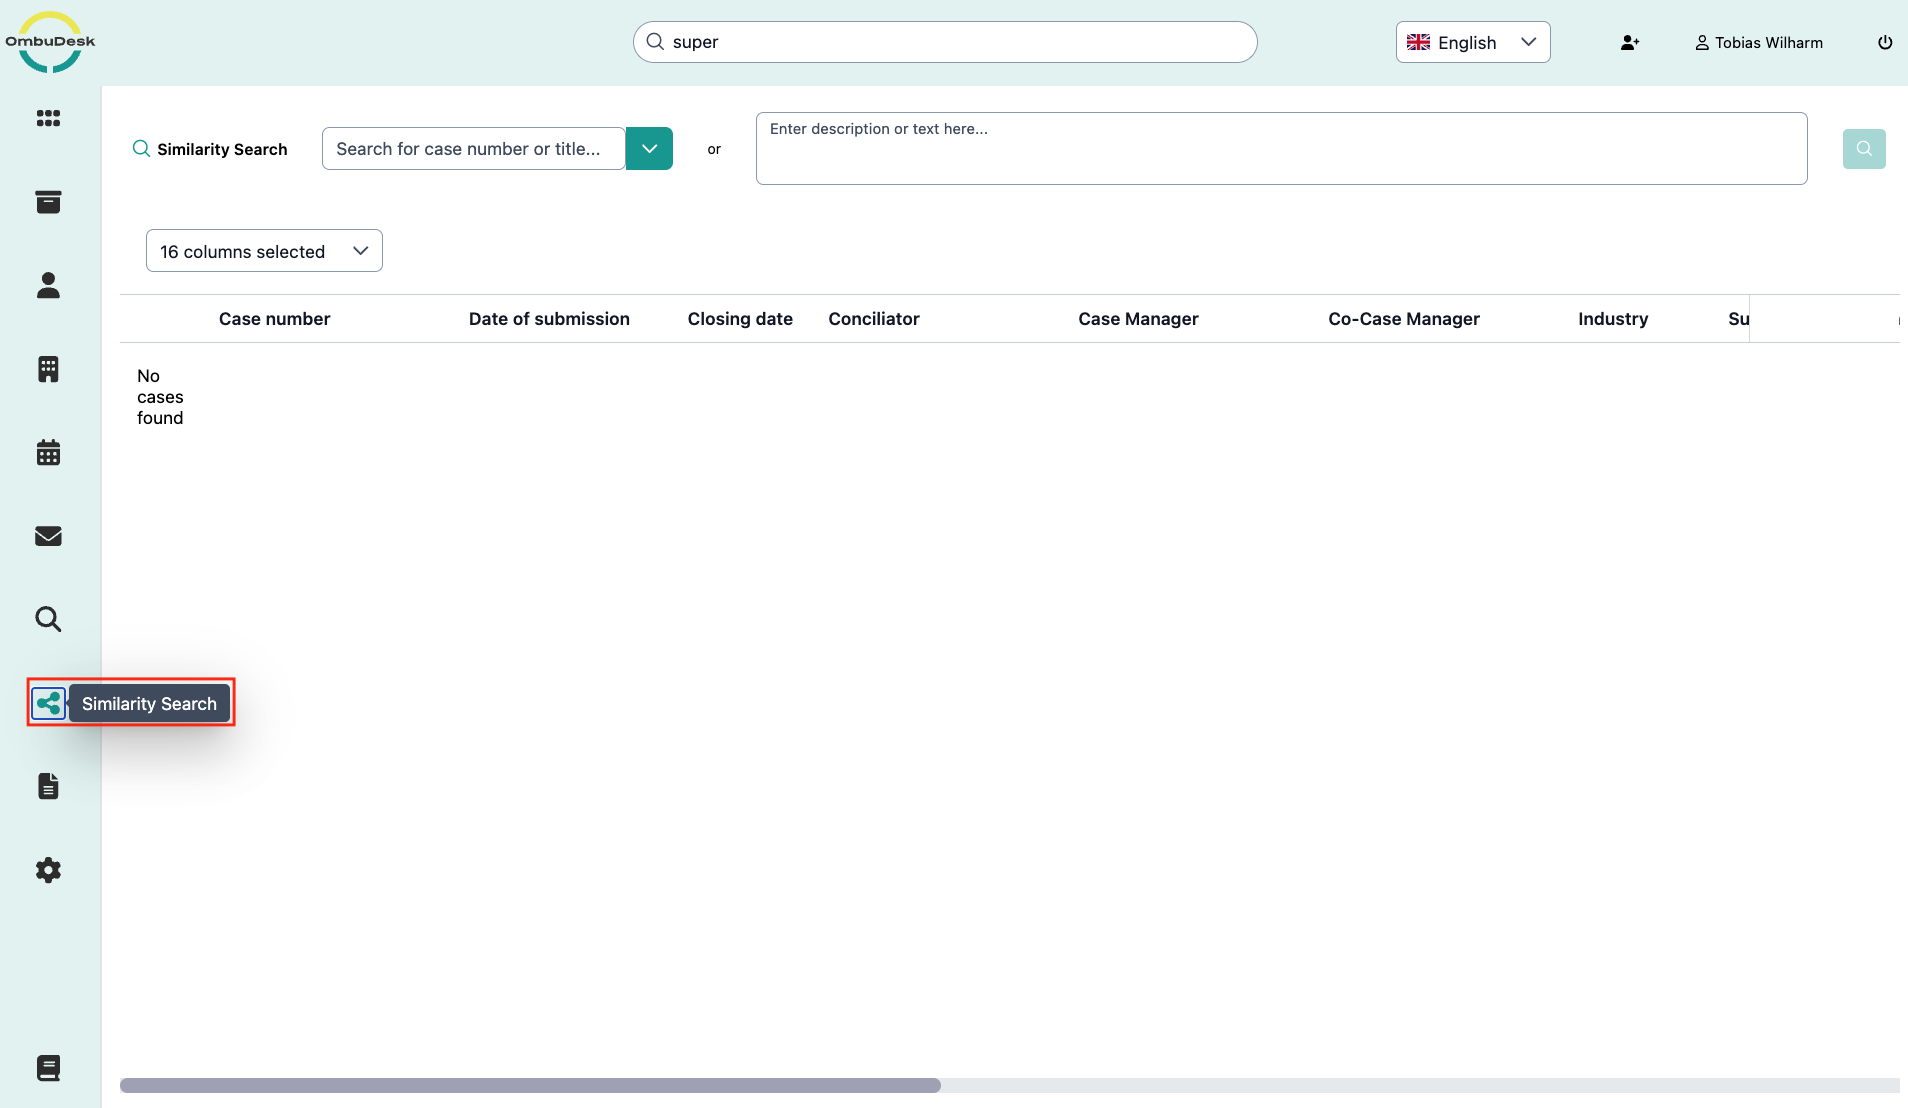
- The similarity search (the open triangle outlined in red in the left navigation)

Global Search
The global search is a powerful tool to search all data in OmbuDesk via free text search.
Which contents are searched by the global search?
The global search works for the following information in your entire data set:
- Messages: Subject and content are searched.
- Documents: Document names and the entire content are searched.
- Notes: Names and contents of all notes are searched.
- Deadlines: Names of the deadlines are searched.
- Tags: Assigned tags are searched.
How does the global search work?
The global search is an integrated search engine.
The global search behaves similarly to common search engines you are used to, e.g., Google.
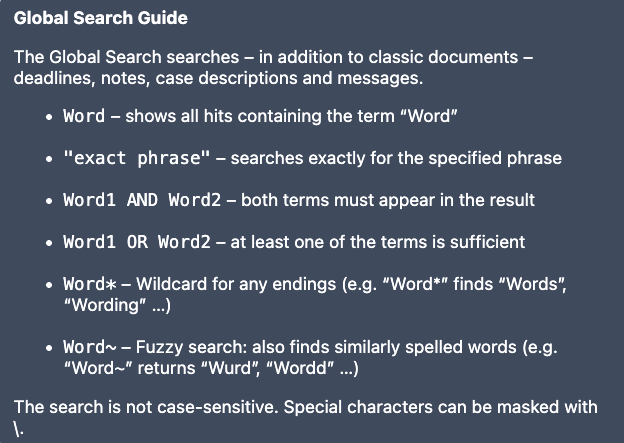
You can refine your search with the following search commands:
How are your search results shown?
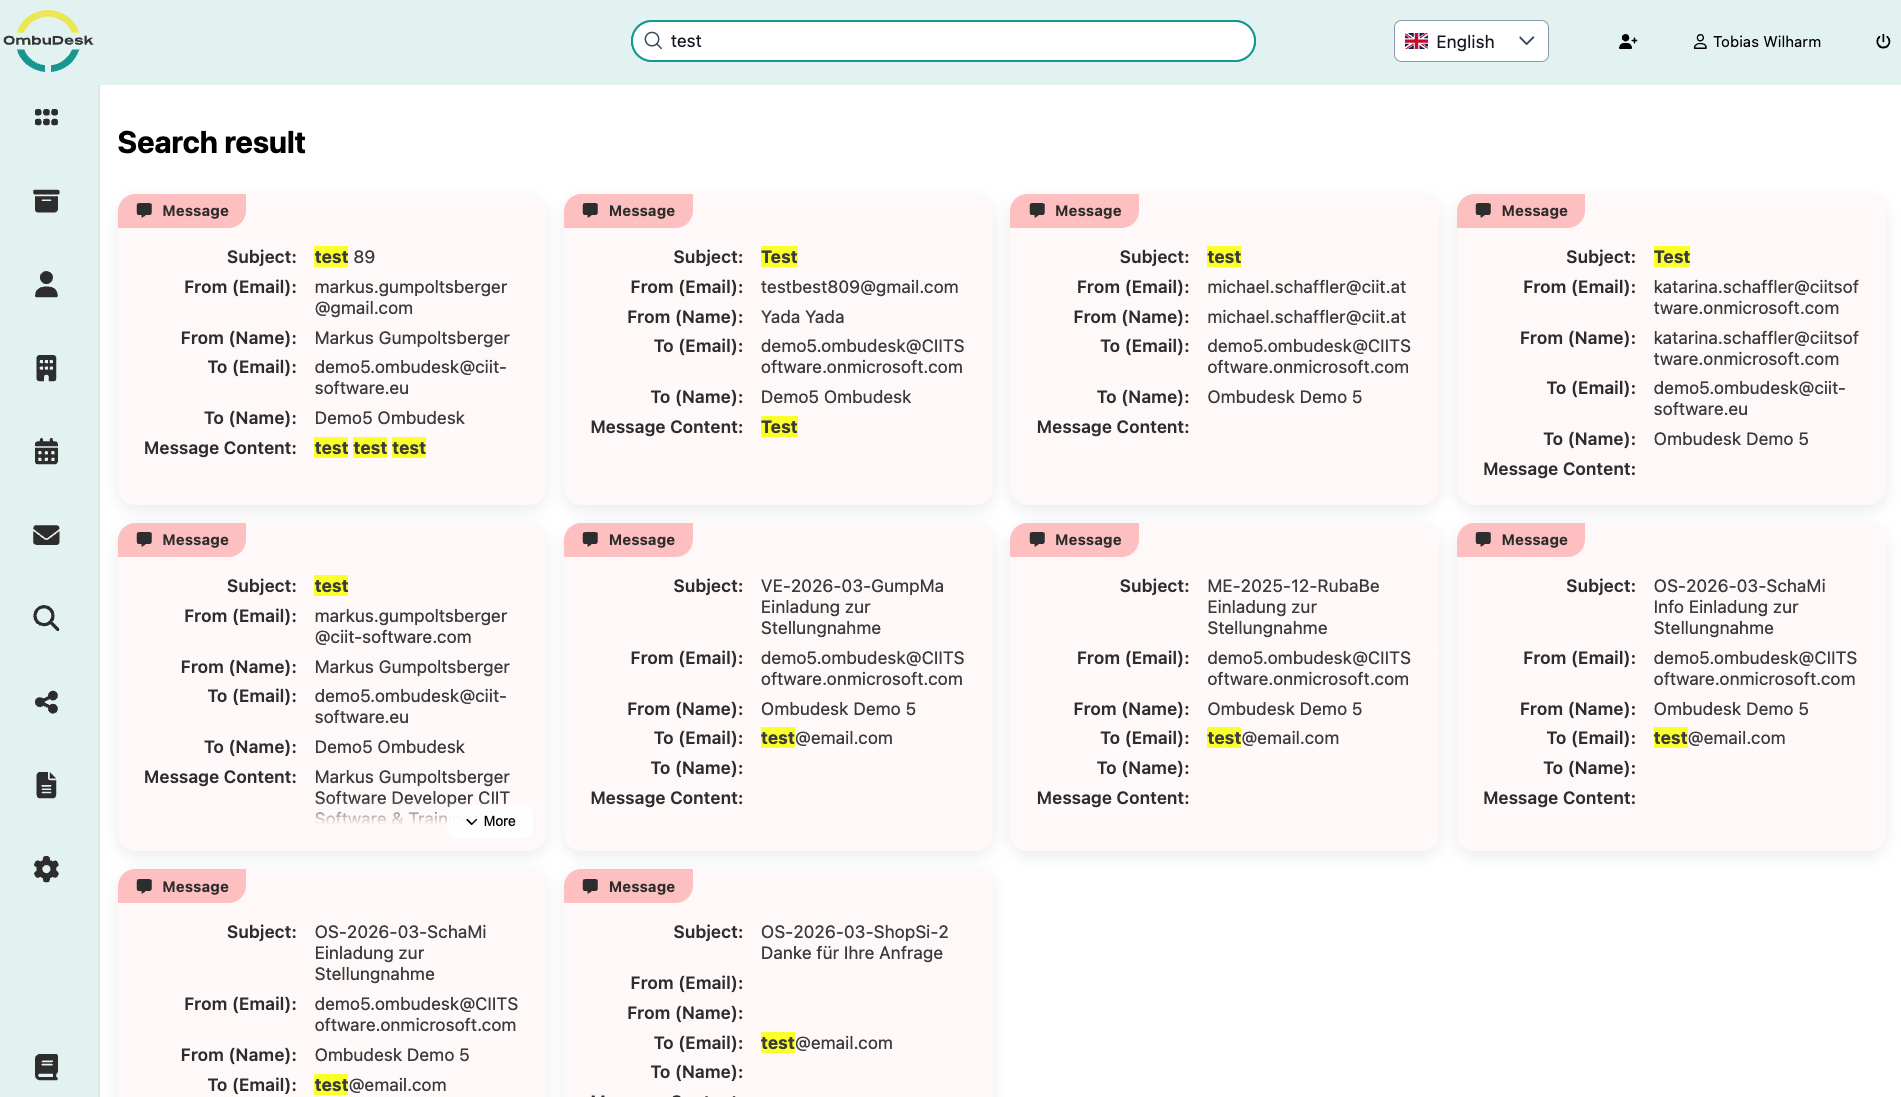
- The application highlights the searched term(s) in yellow for each of your hits.
- The application groups your hits by the type of content found (documents, messages, deadlines, etc.)
How do you navigate to the found hits of your search?
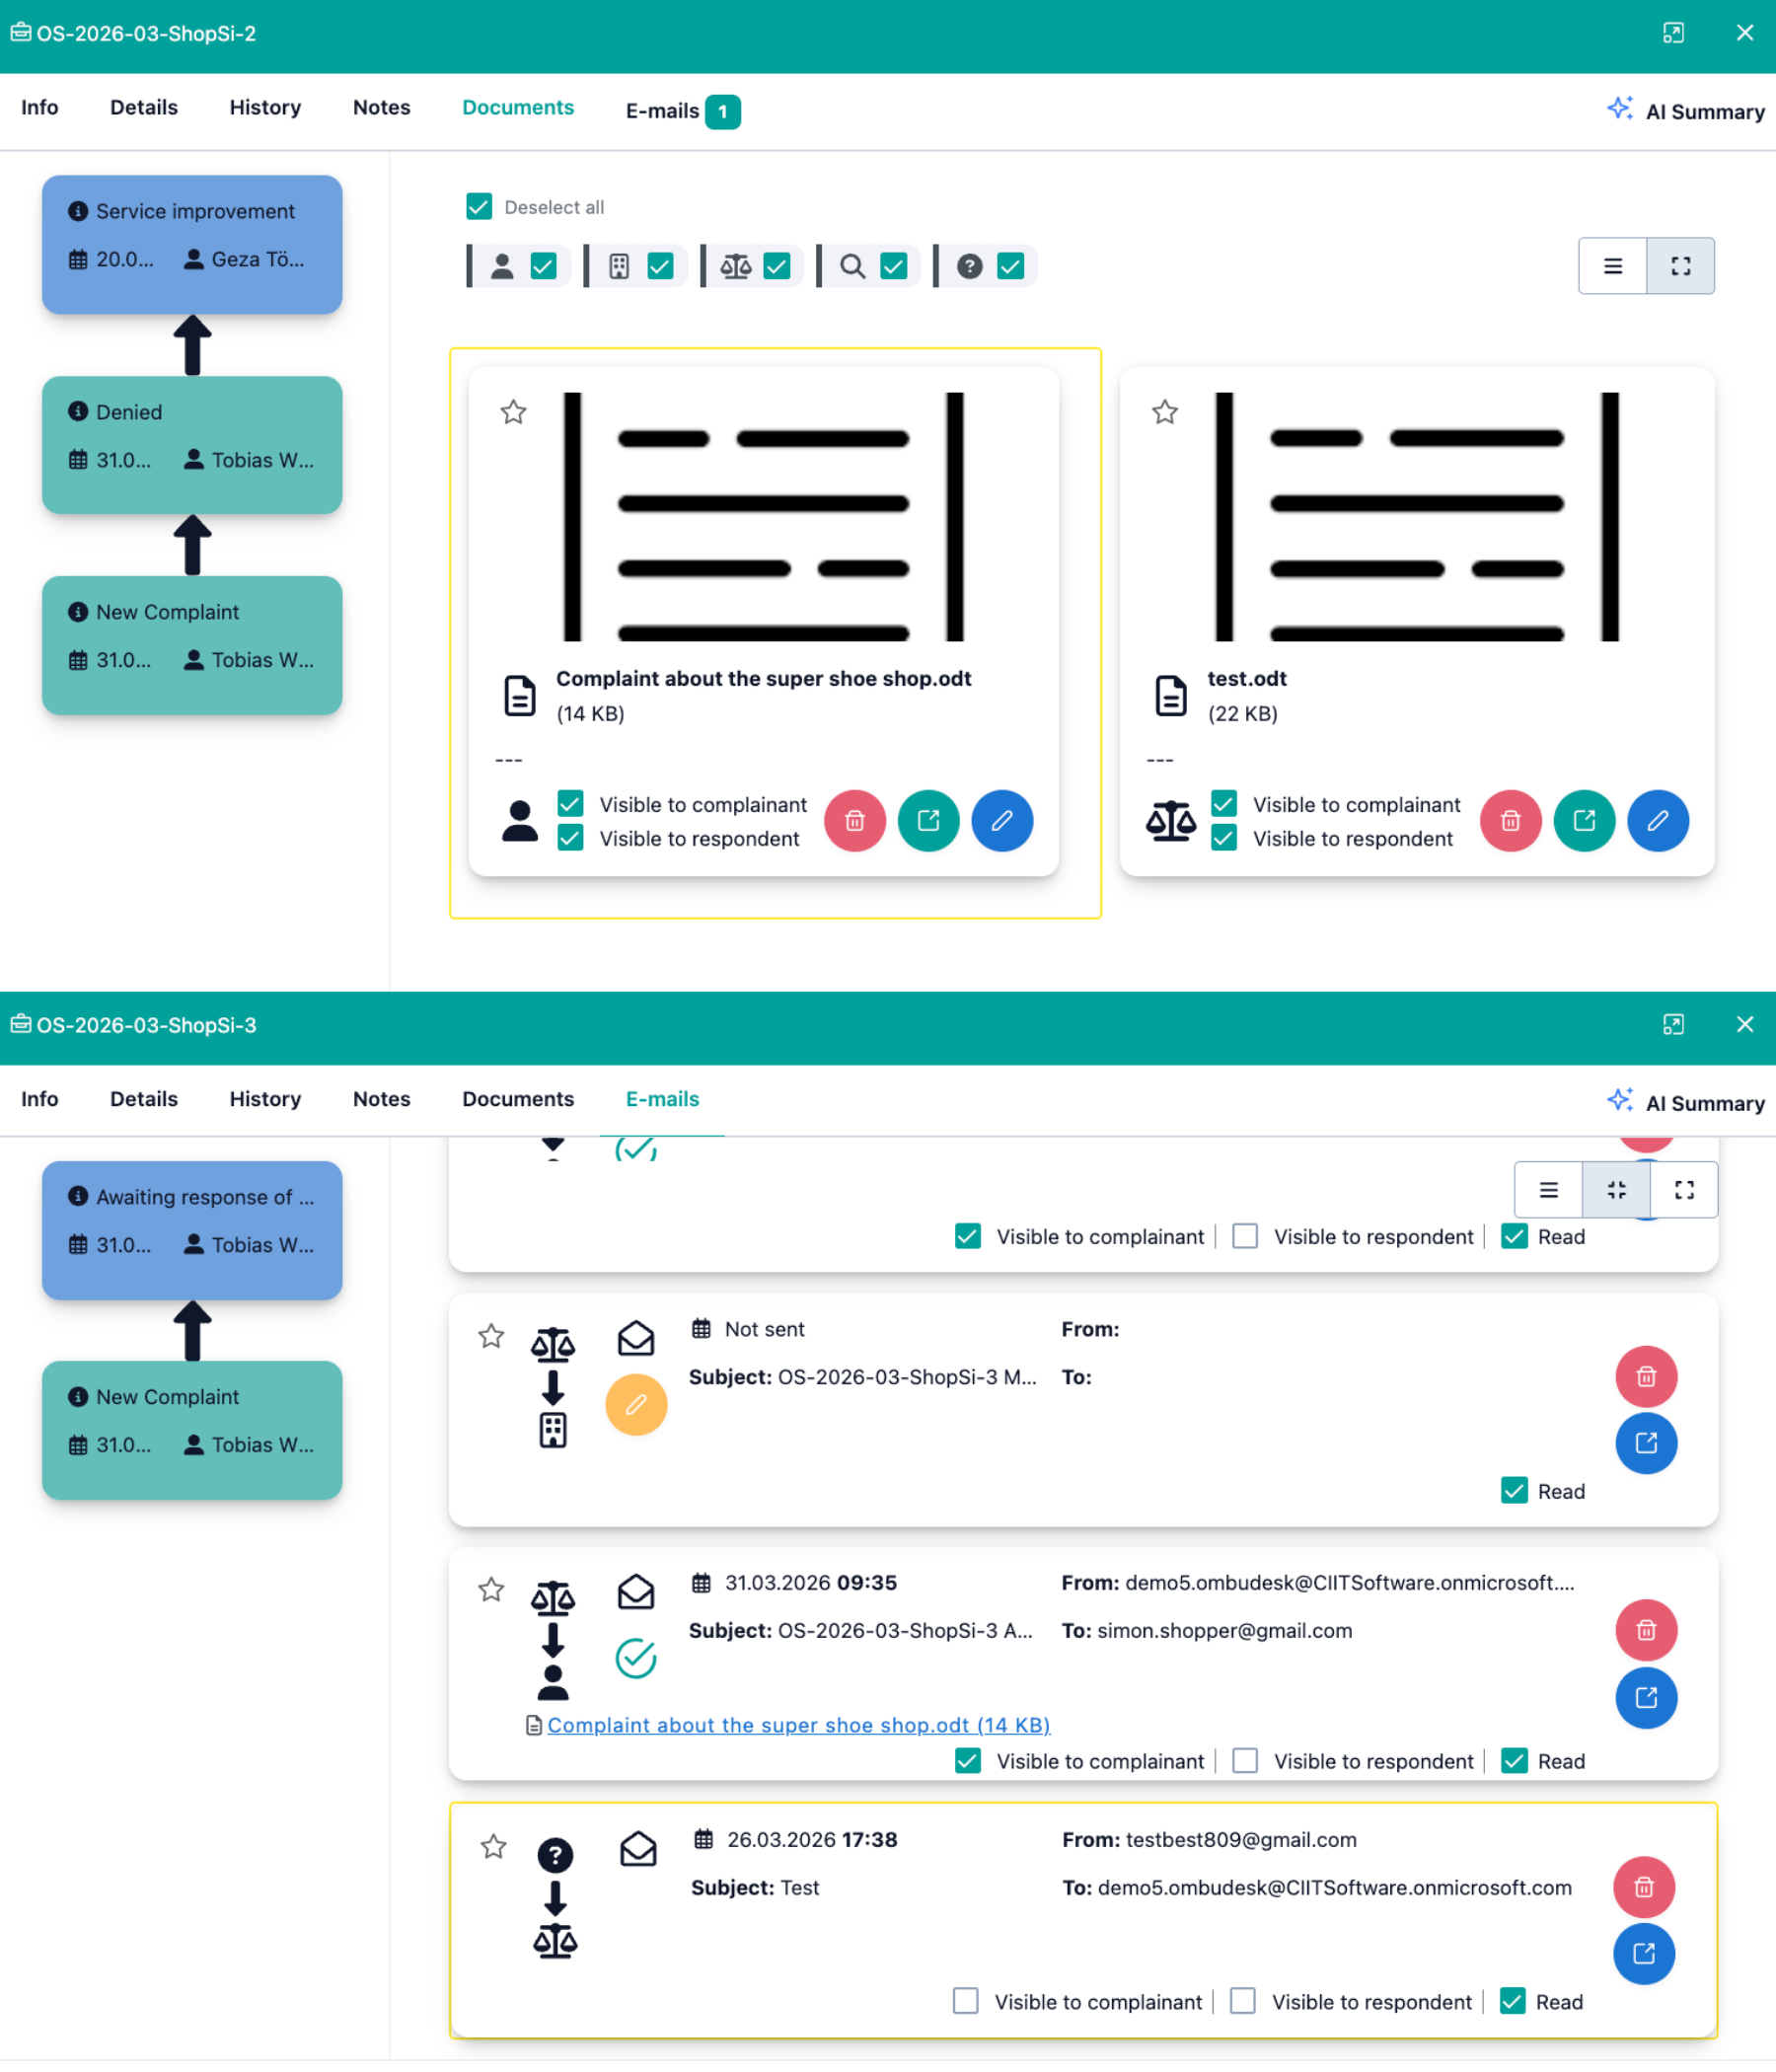
You can call up any search result with a click.
If you click on a search result, the linked file is opened directly and the hit is outlined in yellow.
Filter Search
The filter search allows you to search your entire data set with filters or conditions.
How does the filter search work?
You can use all data fields of the Info tab as well as your custom fields as filter conditions.
This allows you to use the following fields as filter conditions:
-
Data fields like: Creation date, case status, industry, sub-industry, tags, case manager, conciliator, etc.
-
Custom fields like: Rejection reason, special procedure, and mediation result, etc..
In practice, almost all fields of a file are possible search filters. This gives you great flexibility and many possibilities when filtering your data set.
Here is an example:
If you want to see all open cases for a certain industry, e.g., Service Industry, you can achieve this with the following settings:
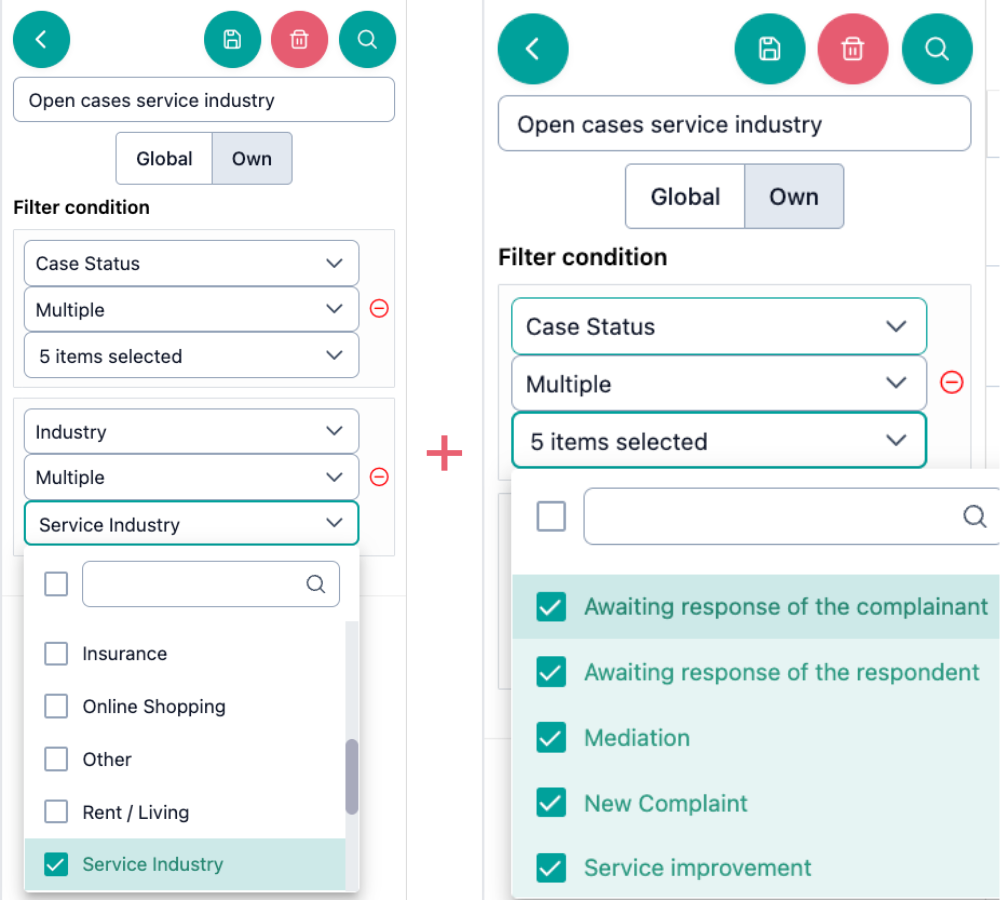
With these settings, you capture all case that are not yet completed and belong to the Service industry. The result is all open cases in the service industry:
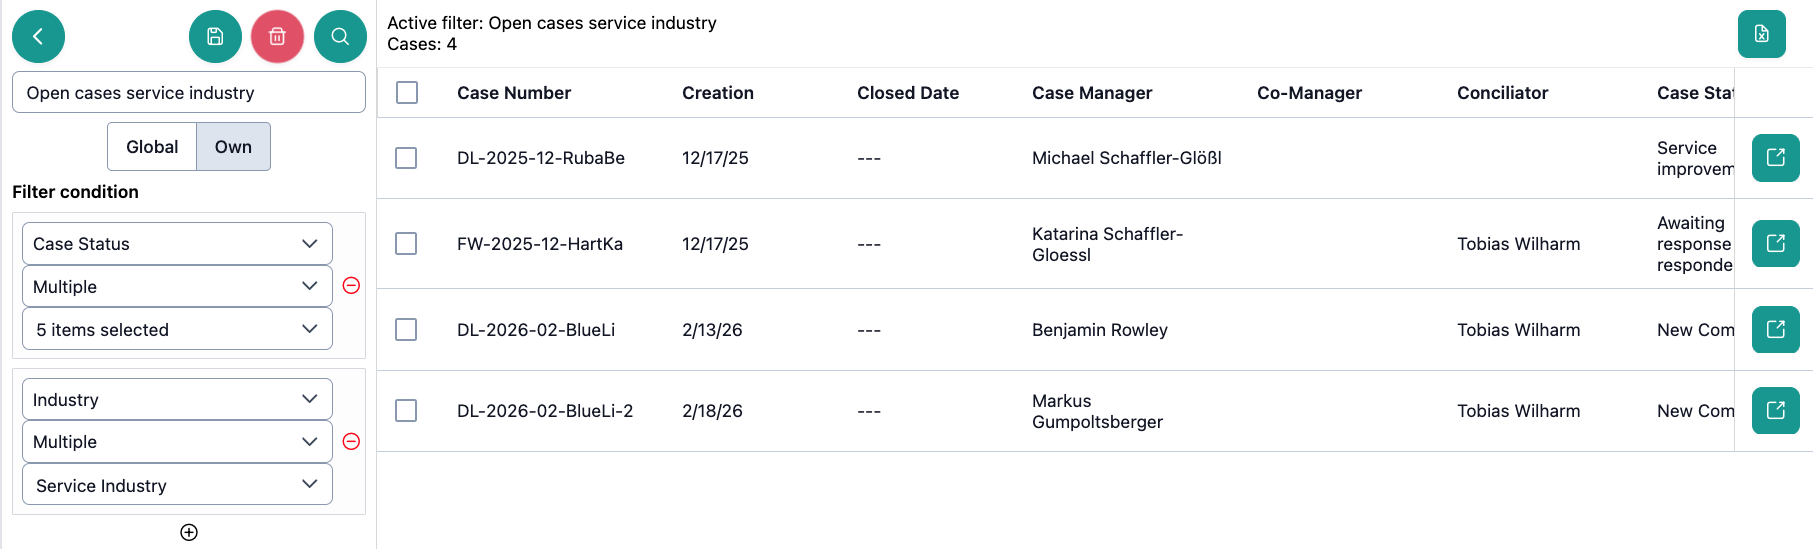
In this example, you can see that the amount of matching cases is displayed next to the name of the filter as "Cases: 4".
What actions are available to you in the filter search?
You can create a new search at any time via the green "Add new filter" button at the top left of the view.
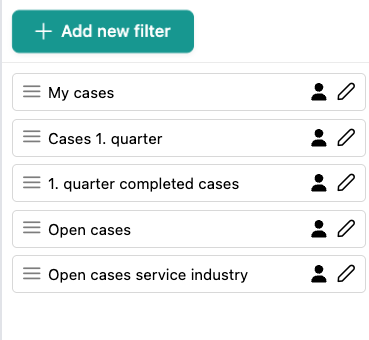
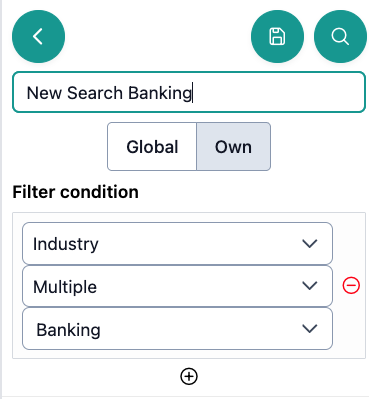
If you click the button, you can assign a name for the new search and add the filter options of your choice. Additionally, you can define whether the new search should be Global (visible to everyone) or Own (visible only to you).
On the right edge of the window, you will find additional actions that allow you to:
- Download all data: Create an Excel export of all found files with a click using the green document button.
- Bulk actions: Apply "Change case status" or "Change of responsibility" for all search results marked by you via the green action button.
- Open file: Open a case that was found by your filter search via the green arrow symbol.

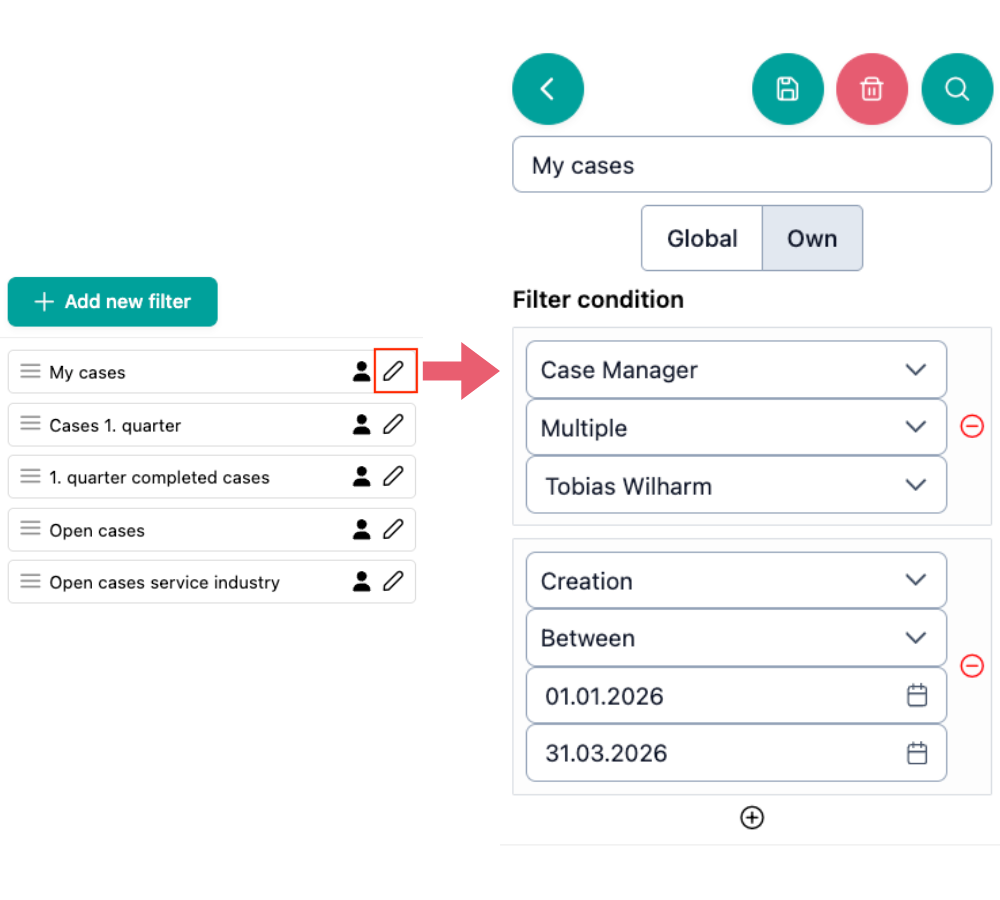
In addition, you can edit any saved filter search at any time via the green pencil symbol on the far right.
You can then adjust the filter conditions, delete the search, perform the search with the current settings, and change visibility (Global/Own):
What information do you see for each search result?
When you perform a filter search, the following information is listed in tabular form for the corresponding cases:
- Case number
- Creation date & completion date
- Case Manager, Co-Case Manager & Conciliator
- Status and Sub-status
- Complainant + email
- Representative
- Respondent
- Expert
- Industry & Sub-Industry
You can move the view using the gray slider at the bottom to view all information.
What makes the filter search particularly useful for your dispute resolution office?
The filter search is a powerful search function because you can customize all search parameters yourself. Additionally, you can save any search created this way and repeat it instantly with a click on a stored search.
The filter search is also linked to your overview. This means you can visualize important key figures for your dispute resolution office. You can find more about this under Overview.
Similarity Search
The similarity search allows you to find similar cases in your entire data set.
How does the similarity search work?
Unlike the global search and the filter search, the similarity search does not refer to searchable data or various case attributes.
The similarity search uses case summaries of your files to establish a context with the help of AI and thus find similar cases.
How can you use the similarity search?
You can either ...
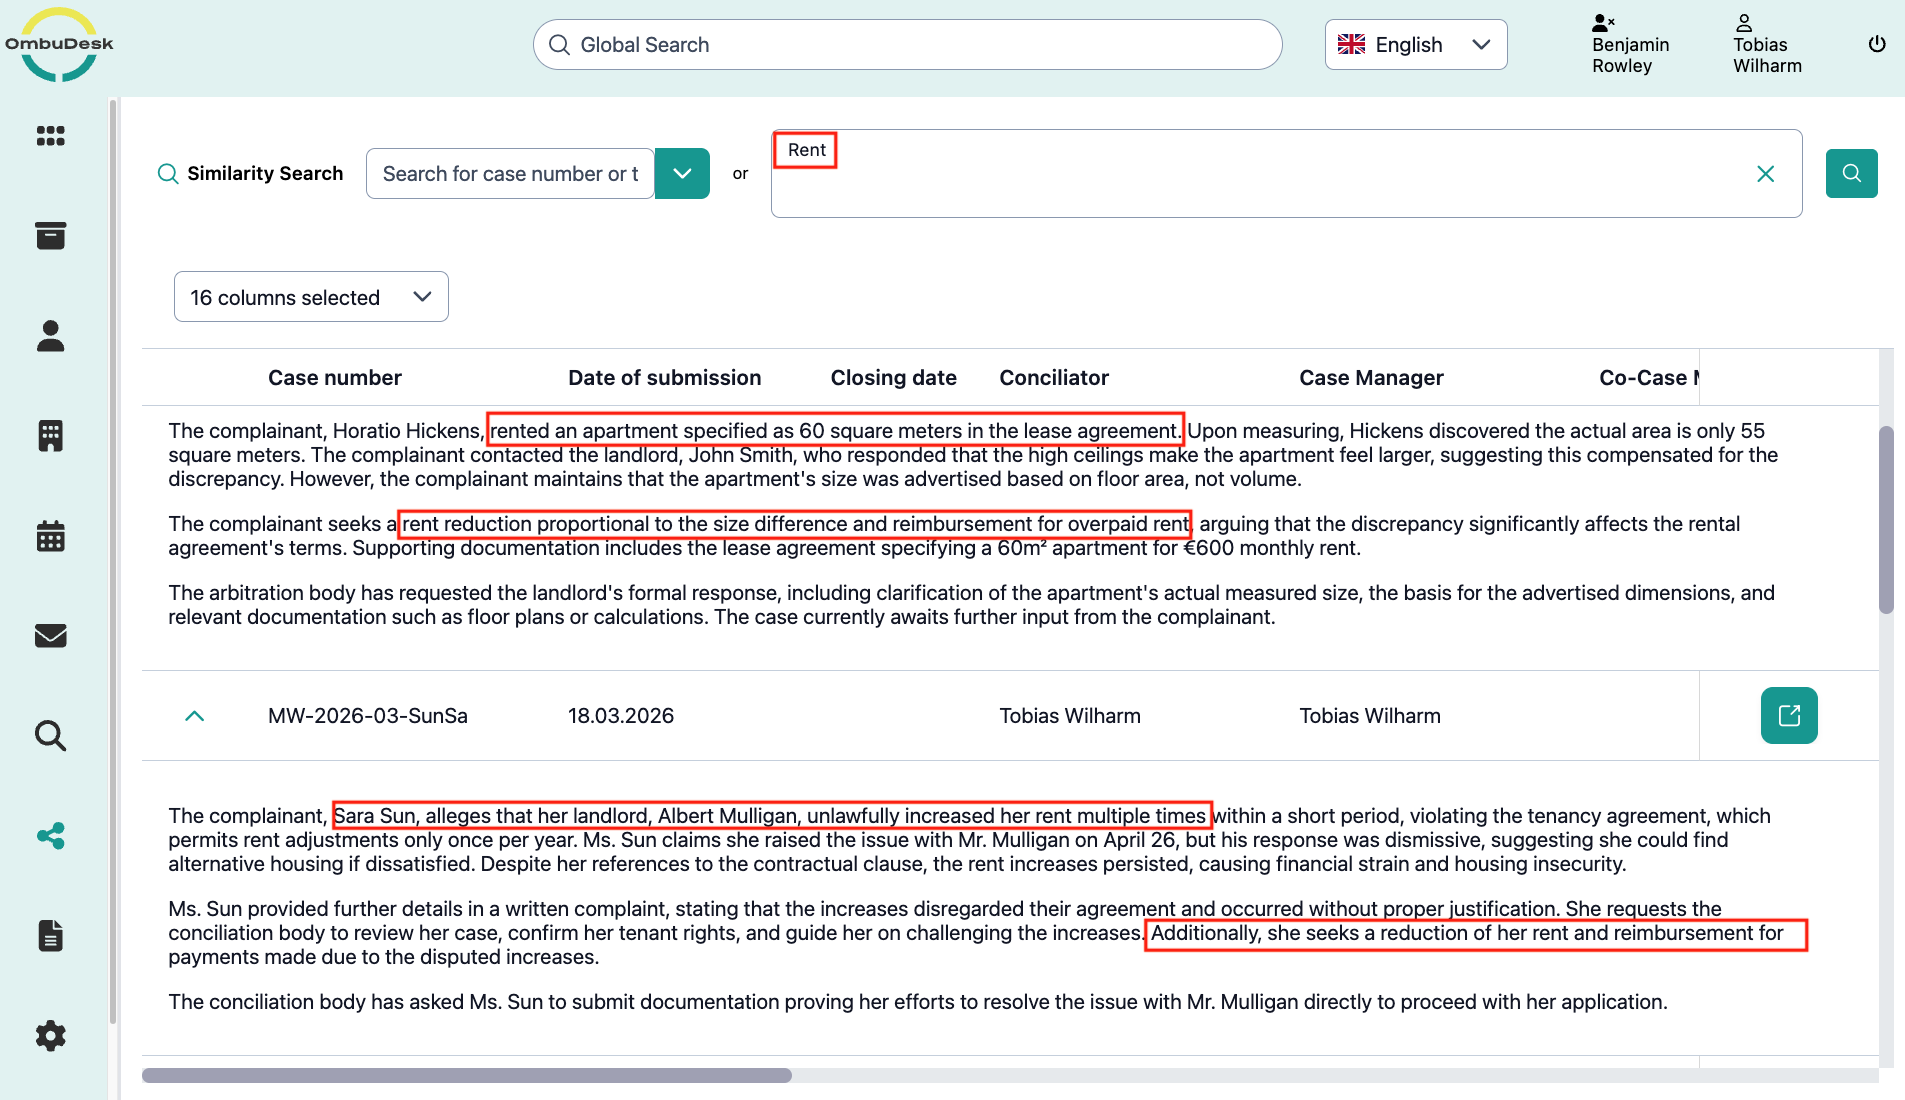
... use the free text field to find similar cases for terms of your choice.
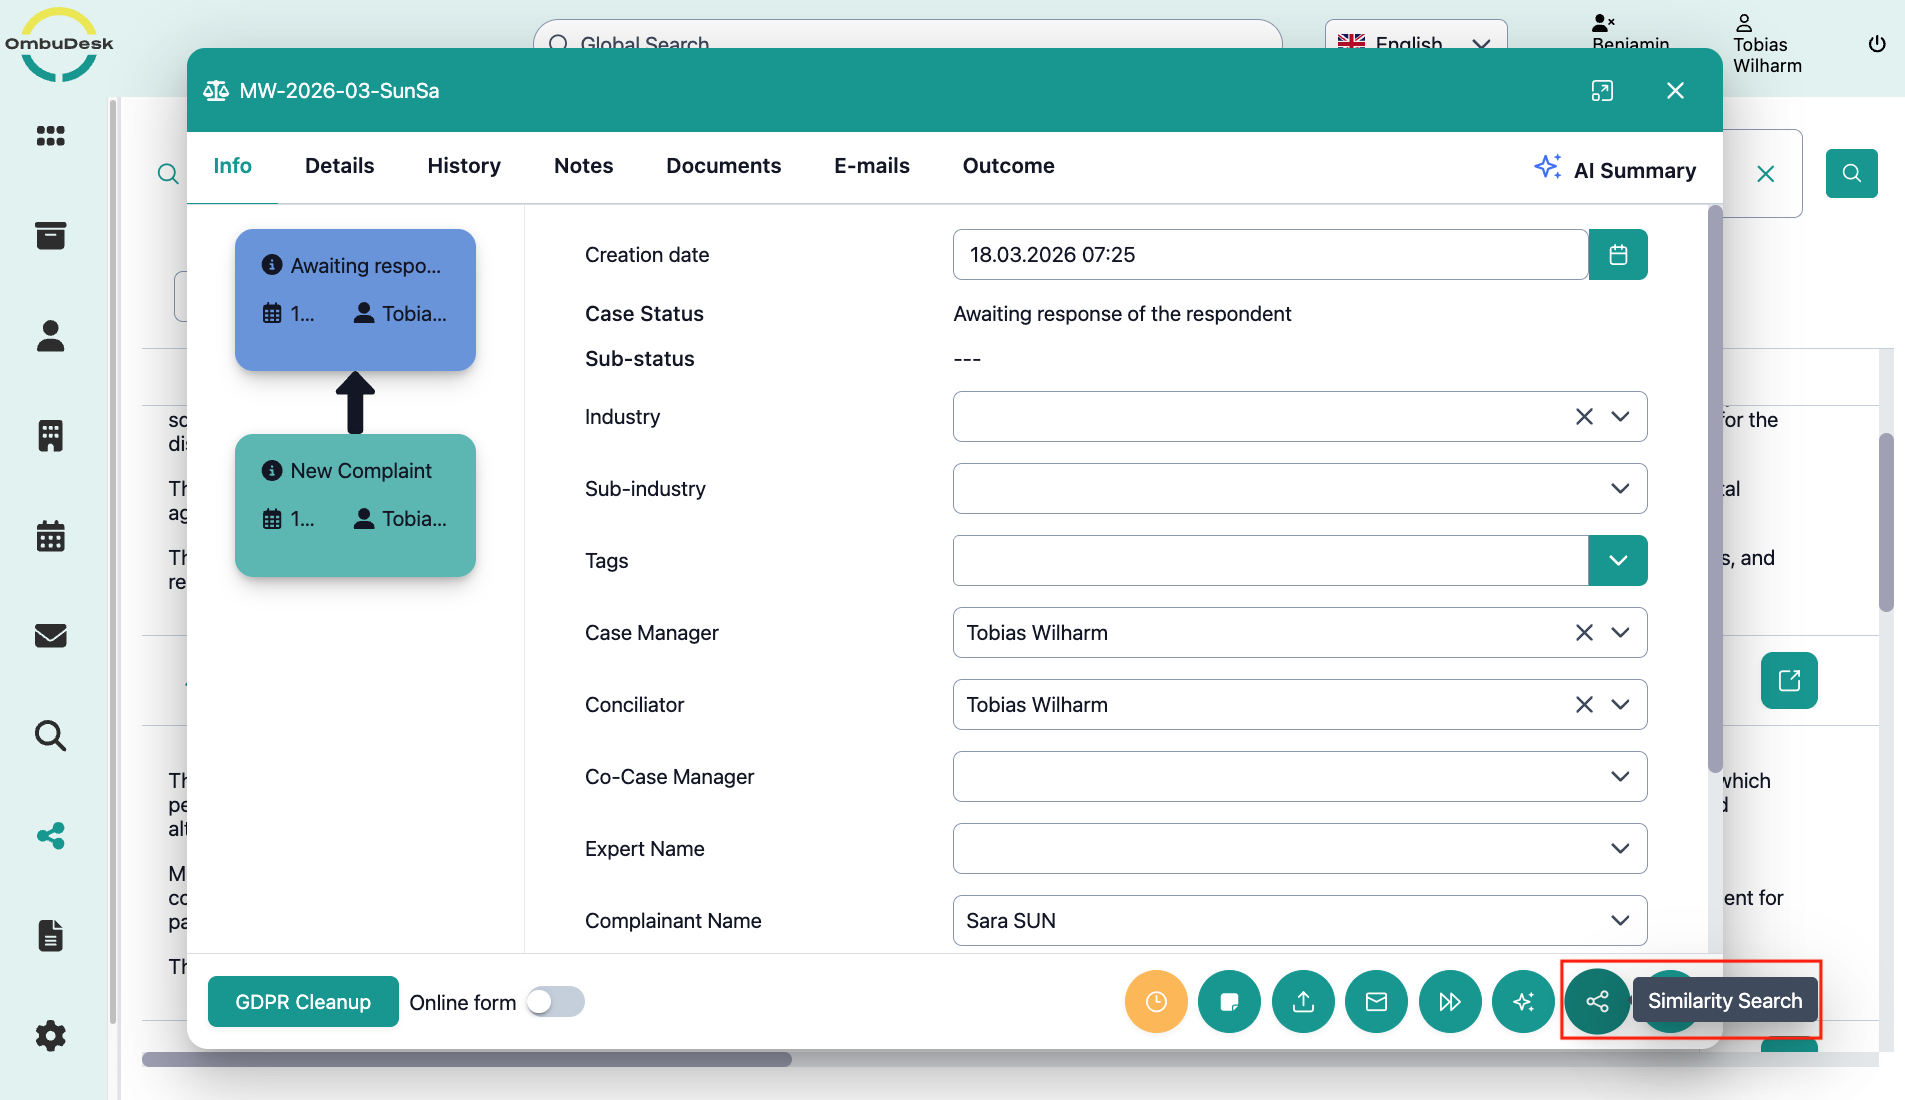
... or call up the similarity search within a digital case file to find similar cases to the opened case.
In this example, it is an arbitration application in the online shopping industry dealing with dissatisfaction regarding the received goods.
The similarity search now finds relevant & similar cases involving complaints:
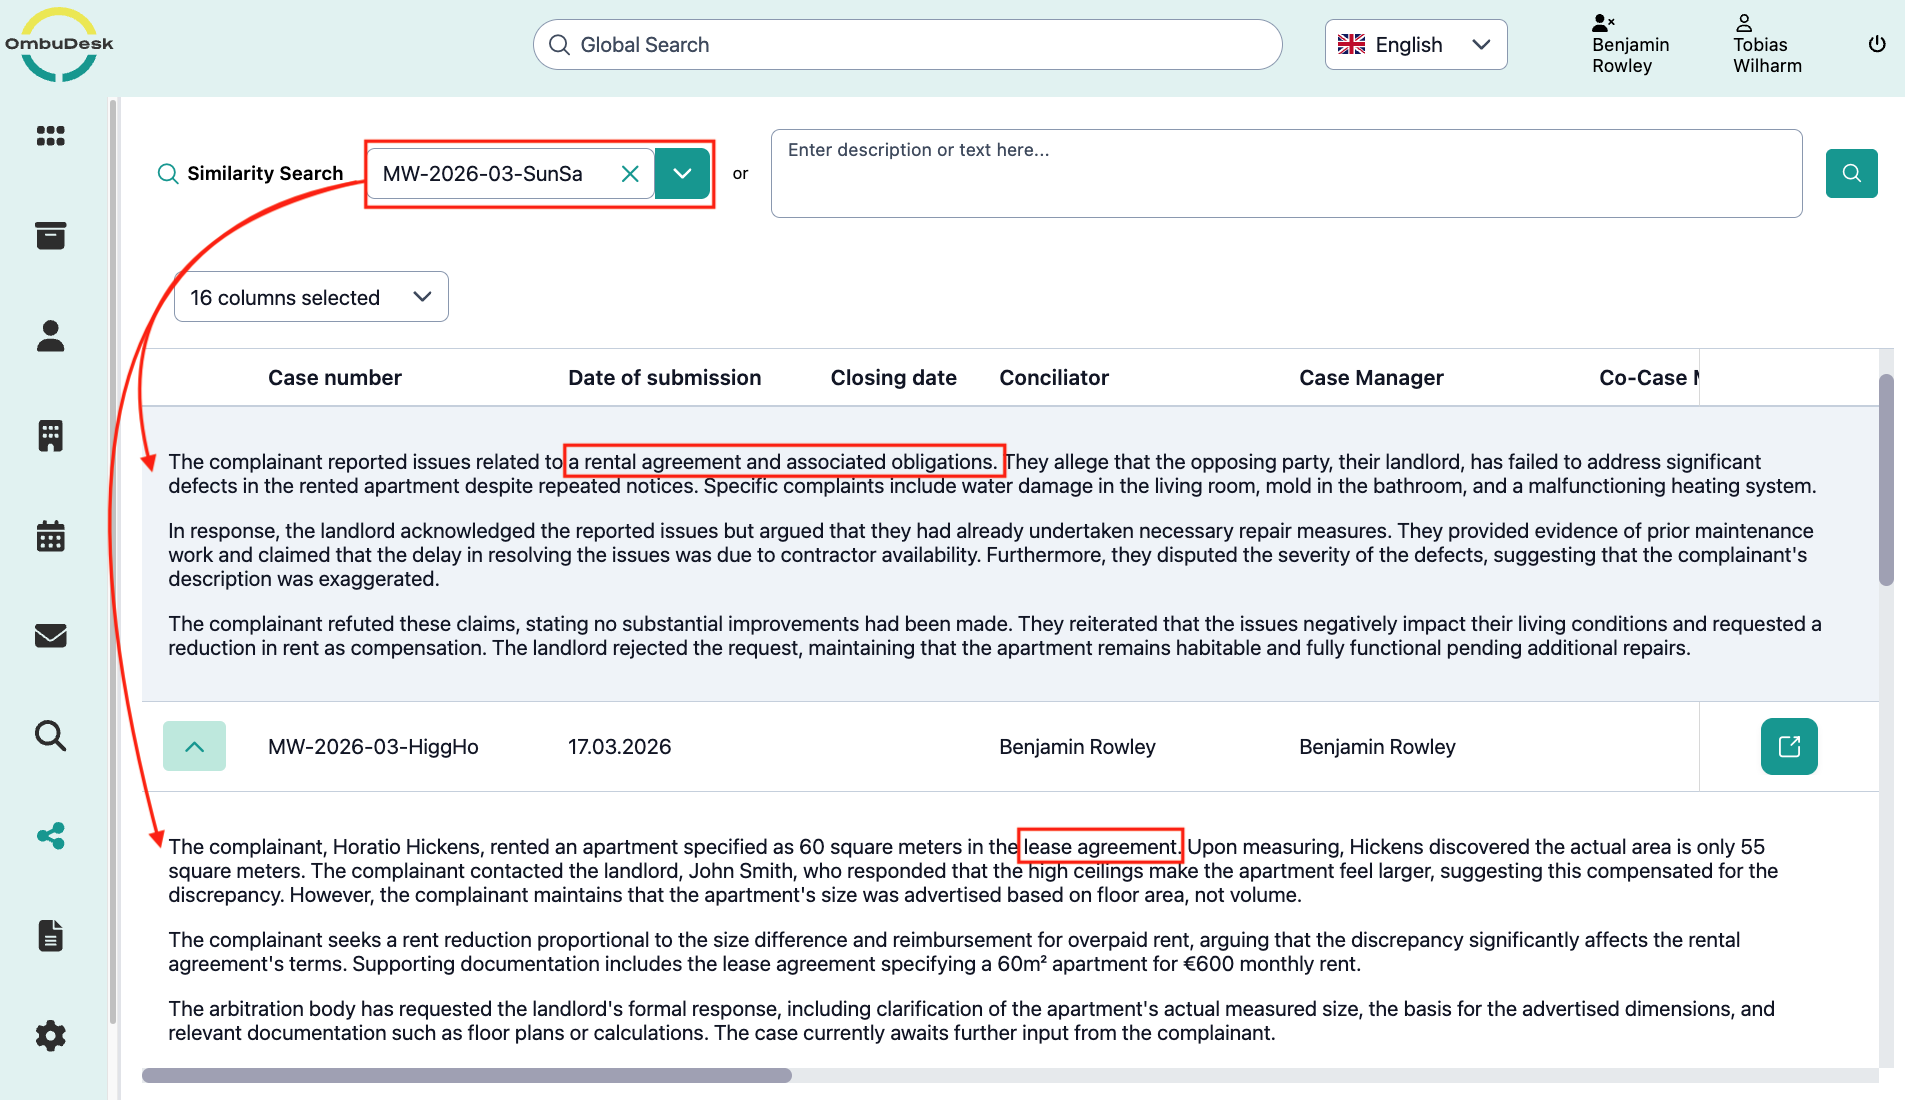
What actions are available to you in the similarity search tab?
The similarity search always opens in a new window. From there, you can navigate to the found similar cases via the green arrow on the right edge.
What information is displayed for the found cases?
You can adjust the tabular information at any time via the column selection and thus filter out important information for you.
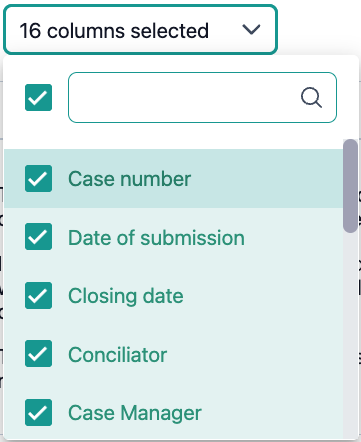
The following information columns can be selected or deselected for display:
- Case abbreviation
- Creation date
- Completion date
- Conciliator, Case Manager and Co-Case Manager
- Industry and Sub-Industry
- Status and Sub-Status
- Name of respondent and representatives
- Report relevance
- Tags