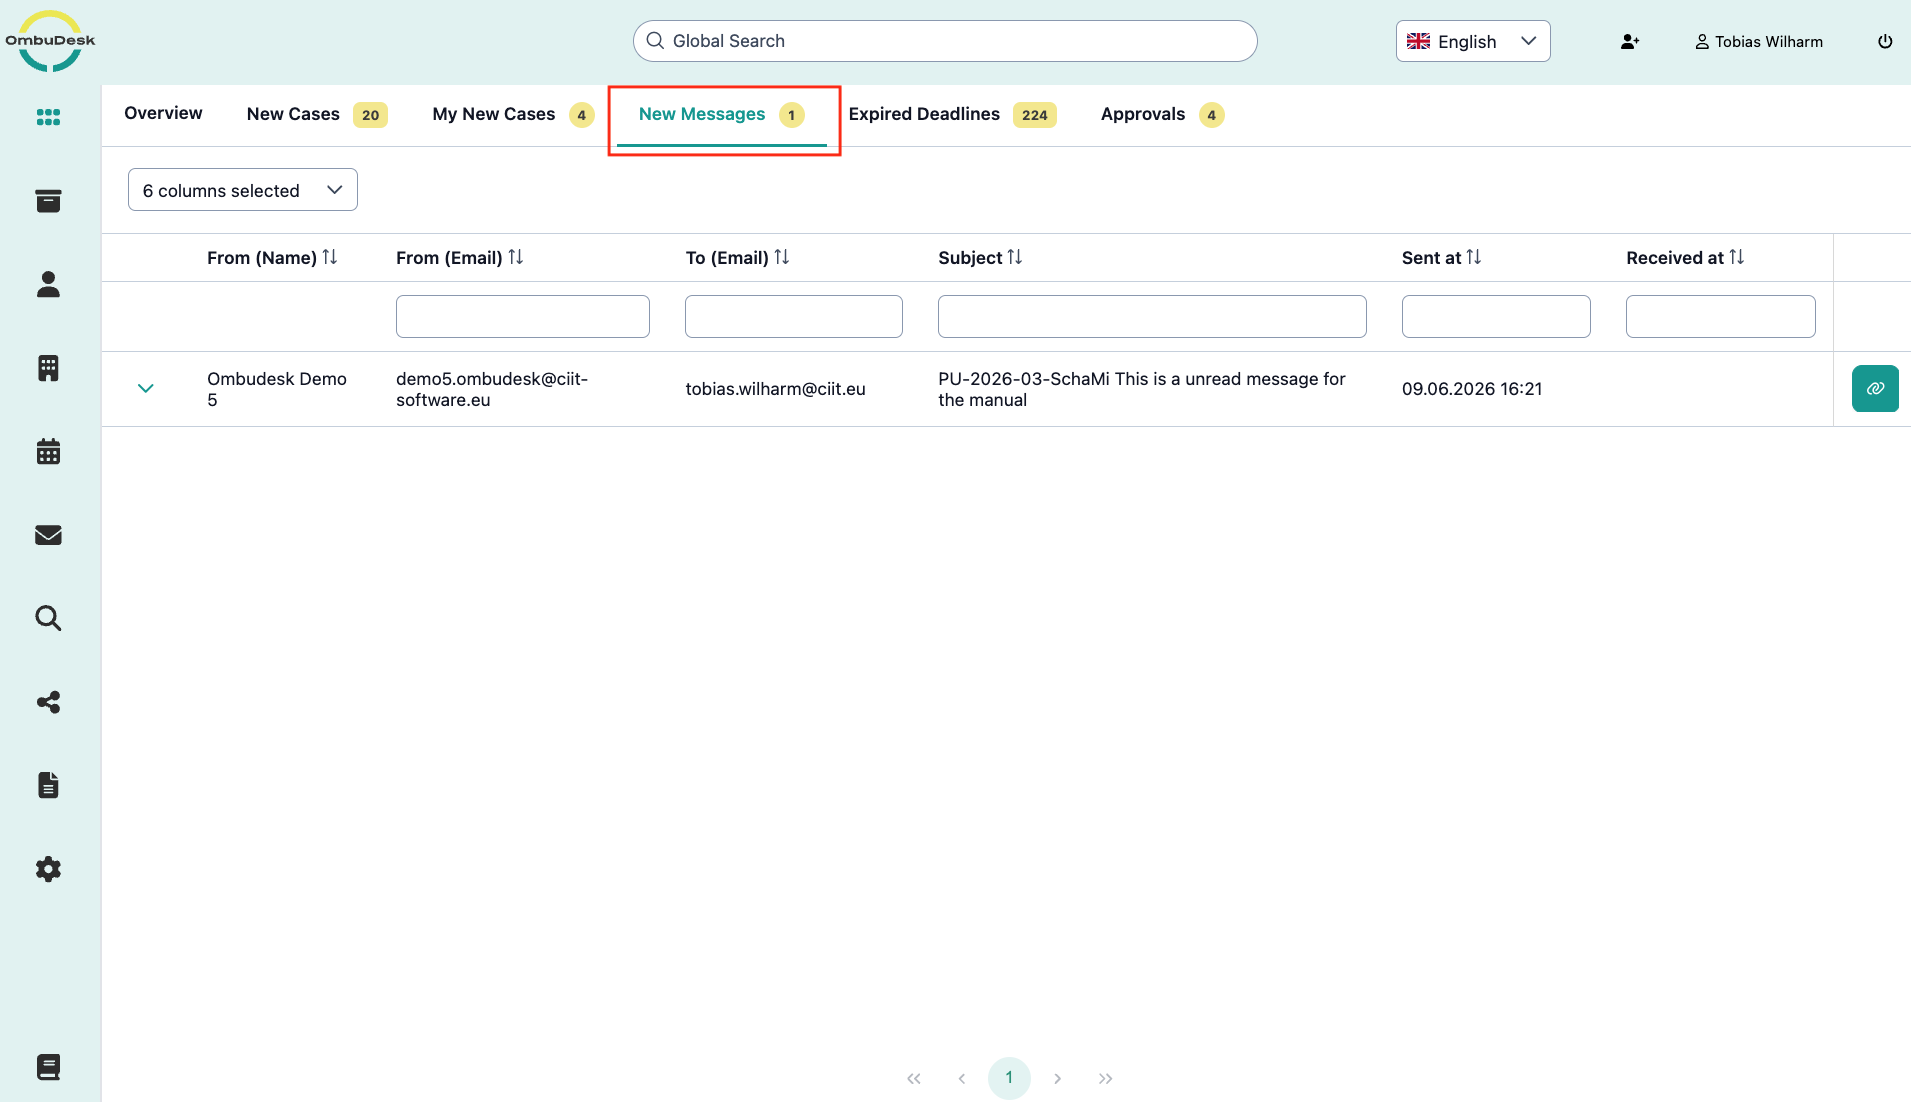
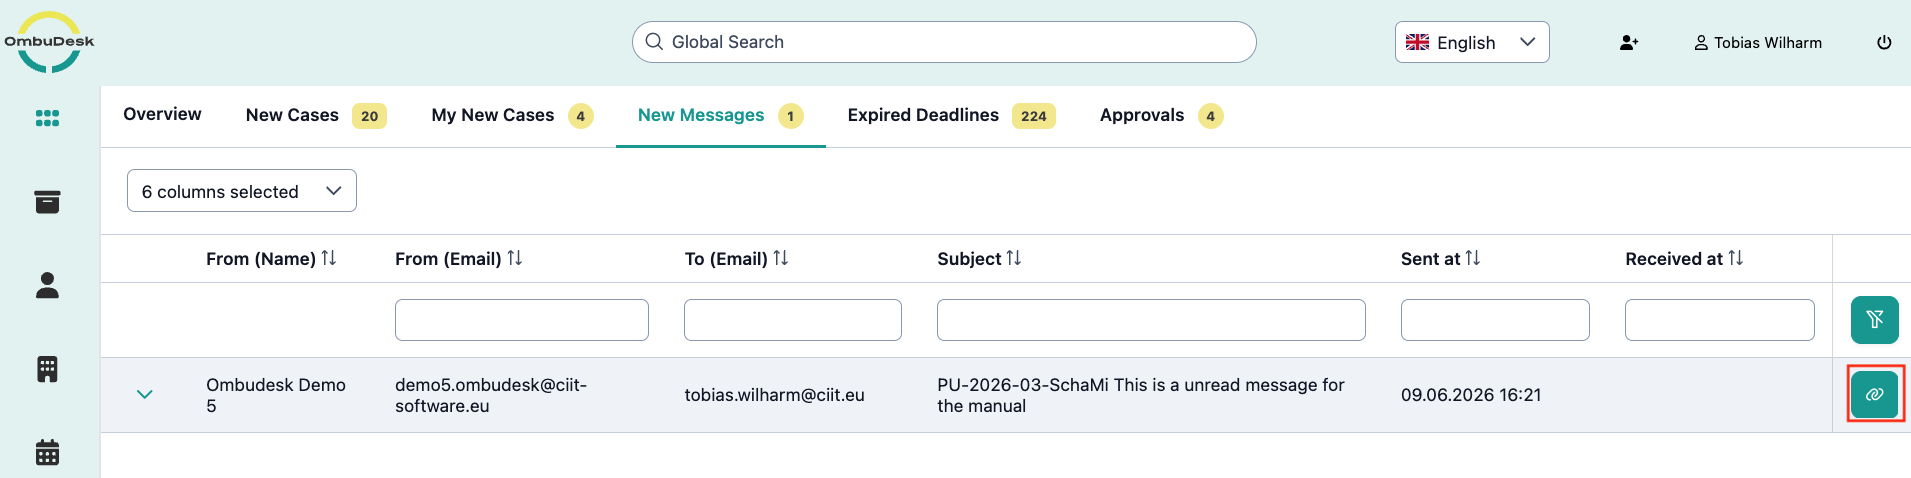
New Messages
The "New Messages" tab shows you all unread messages from your parties that have been automatically assigned to a case by the system.
How is the "New Messages" tab structured?
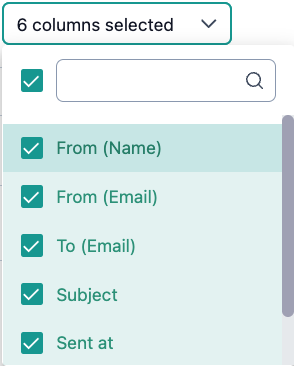
The data page displays 6 different pieces of information about the new messages by default:
- Sender's name - "From (Name)"
- Sender's email address - "From (Email)"
- Recipient's email address - "To (Email)
- "Subject" of the message
- Send date of the message - "Sent at"
- Receive date of the message - "Received at"

You can change the displayed categories by editing the selected columns at the top left.
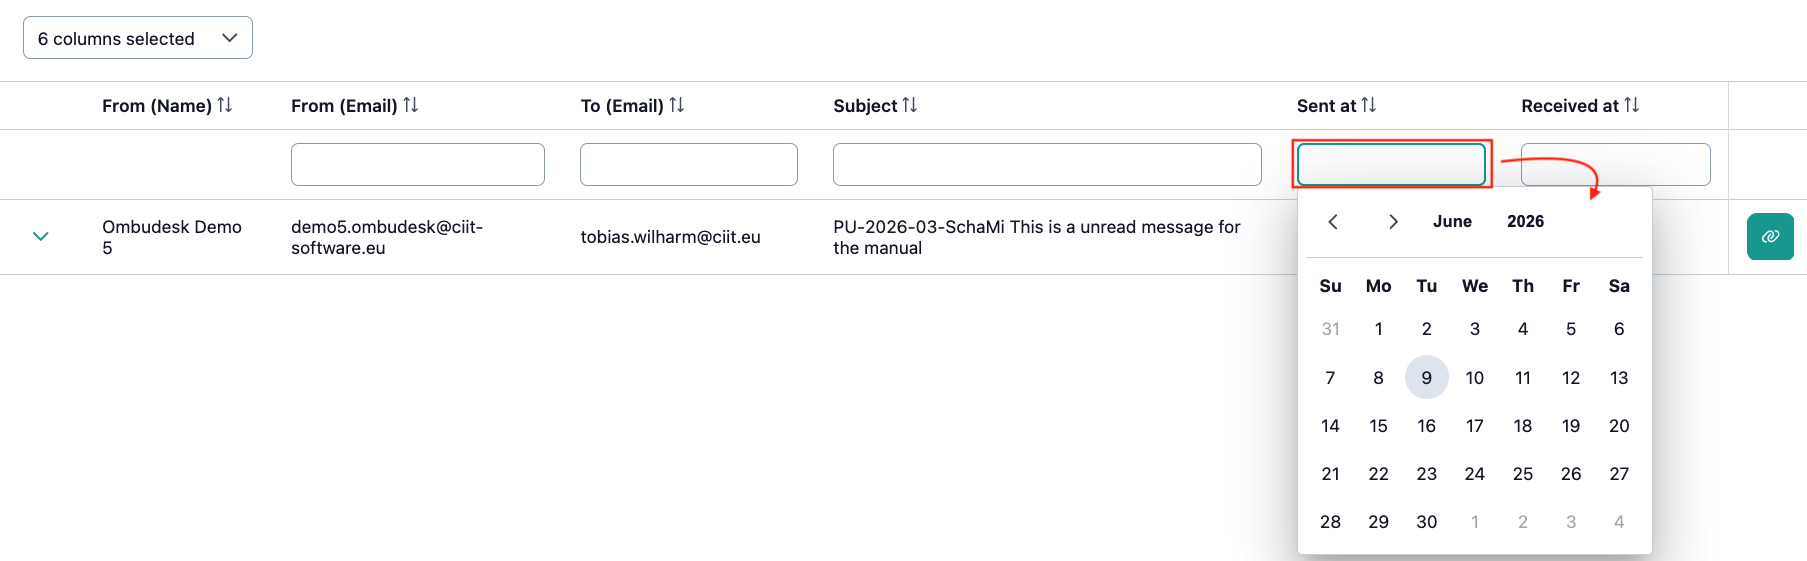
Which search and filter options are available to you?
You can use the free text search for the recipient's email address, the sender's email address, and the subject of a message. Additionally, you can use the "Sent on" (send date) and "Received on" (receive date) of the new messages to filter the displayed messages by date.
Which quick actions are available to you in "New Messages"?
The following quick actions are available to you in this tab:
- Read message:
You can read a "new message" by clicking on the arrow symbol on the left side.
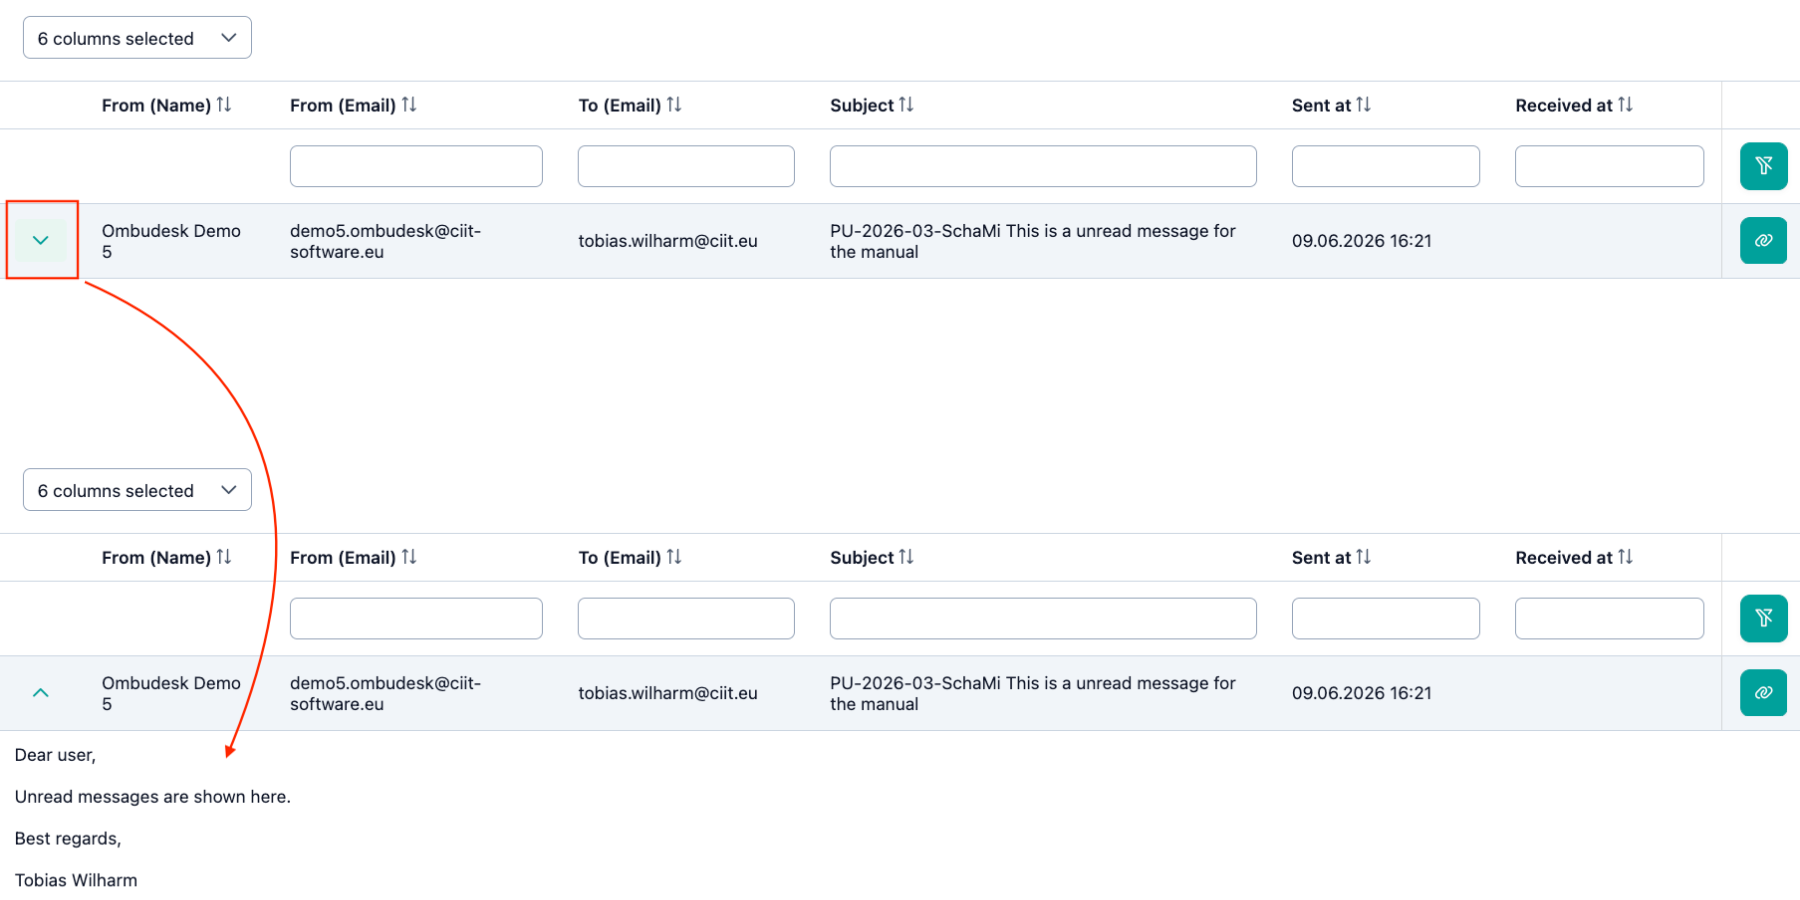
- Open linked case:
You can navigate directly to the linked case with the new message by clicking the clip symbol on the right side.
When is a message no longer displayed under "New Messages"?
You can mark a "new message" as read to remove the message from the "New Messages" tab.
Follow these steps:
- Open the digital case file via the clip symbol (see "Open linked case" above)
- Mark a message as read by marking the "Read" box
- Alternatively, you can navigate to the "History-tab" and mark a message as read there.
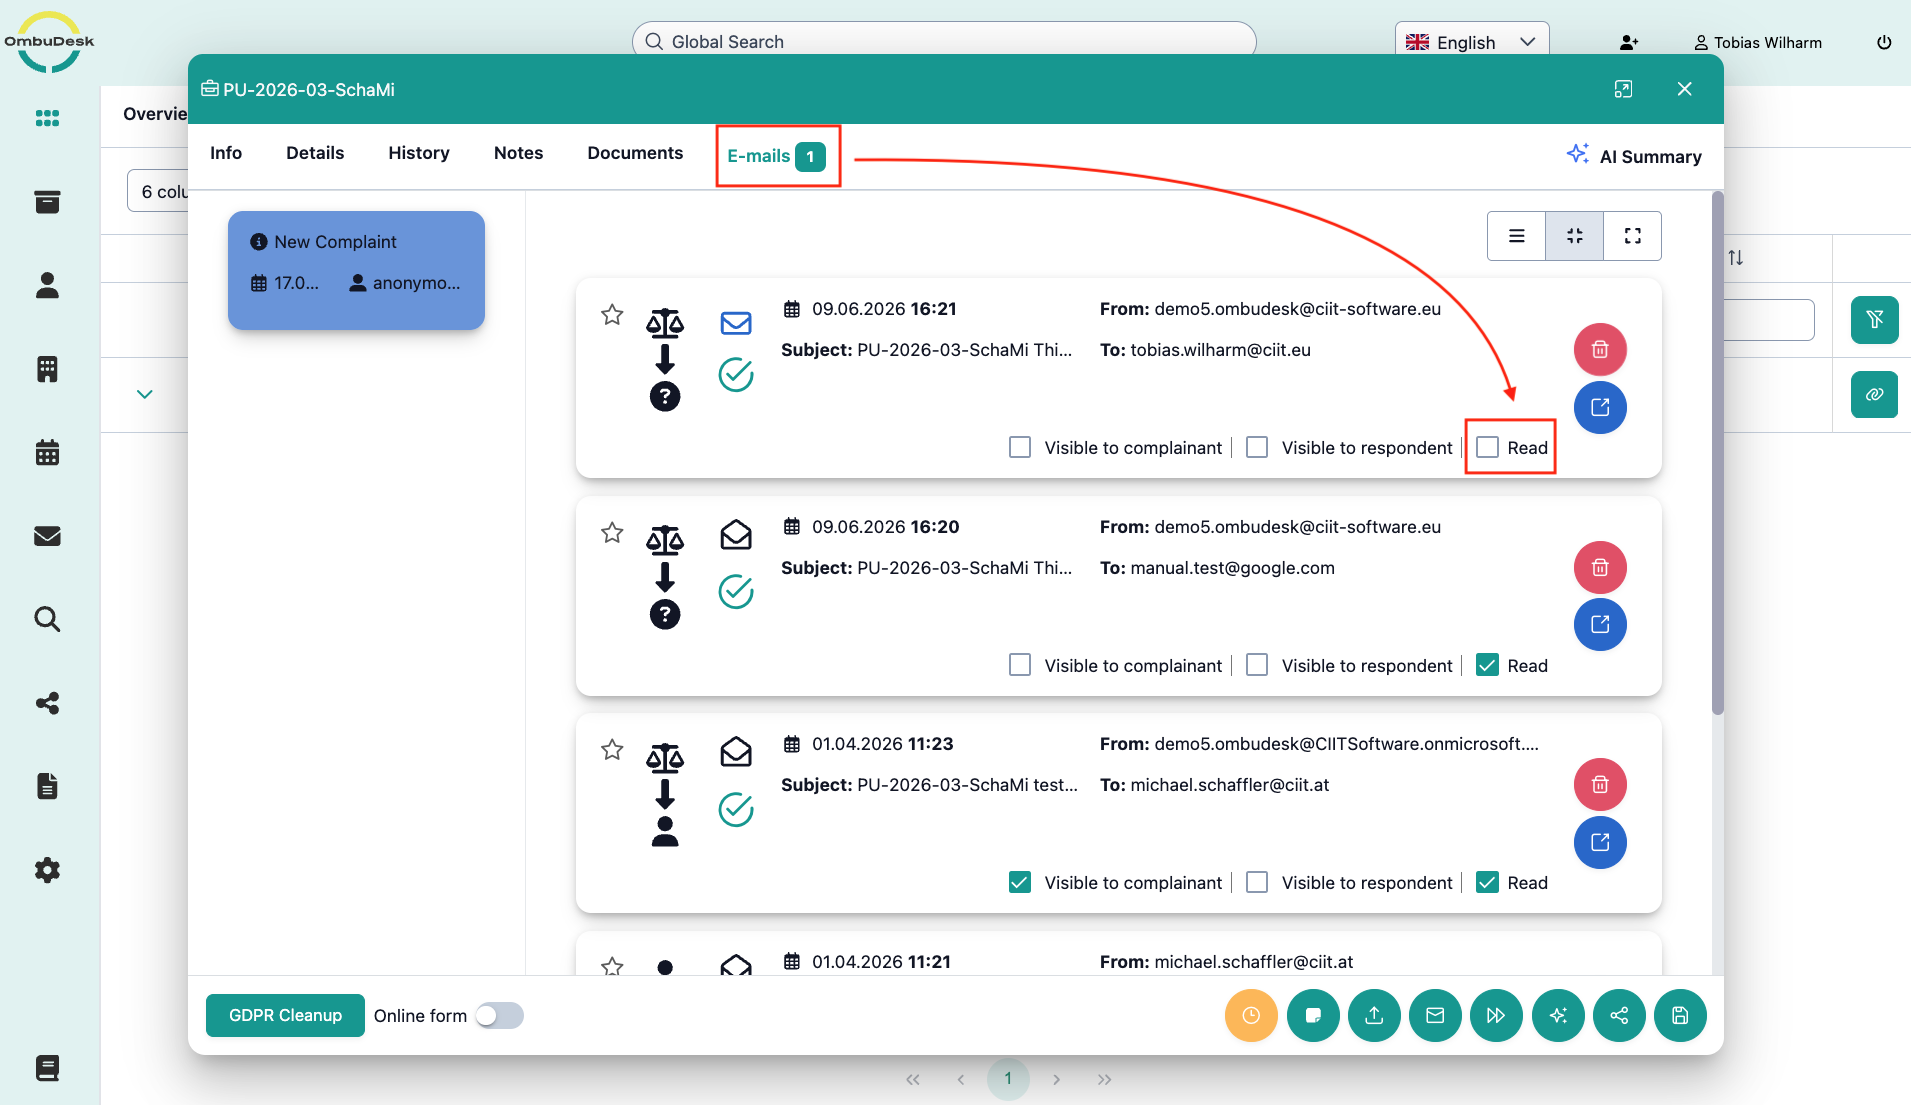
As soon as you have marked a message as "read", the message disappears from the "New Messages" tab.